My Website Design Process: Step-by-Step
An important aspect of hiring a web designer, but one which a lot of people might not think about, is the website design process. How do they go about building the site? How much do they allow the client to get involved in the process? Is their process well-intentioned and methodical, or is it chaotic and all over the place? Does it seem slow and inefficient with way too many steps and milestones, or is it streamlined and geared towards delivering a website quickly? I briefly describe my process on my website process page, but this article goes more in-depth on my website design process and provides some insight into how I work with my clients to build their website.
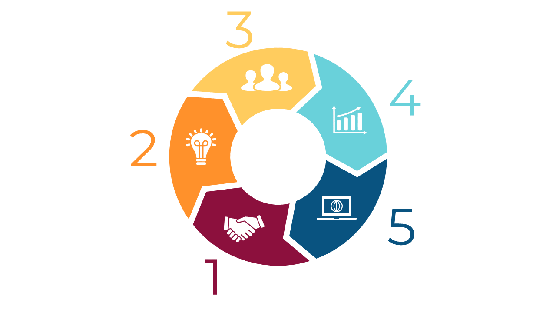
Step 1: Free Consultation
When I first get in contact with a potential client, I’ll first encourage them to fill out a questionnaire online via my website. This survey will provide me with some background on the business or organization, what the scope of the project is, and some other aspects that might help me get a “lay of the land” for the upcoming project. Then I’ll schedule a meeting where we can meet, go over the answers to the questionnaire, and dig into the details of what’s involved. I’ll use this meeting to draft a contract with a price of the project, 50% of which will be due up front, and the balance will be due upon launch. Everything in this first step happens at no cost to you, so there’s no risk or obligation to you at all.
Step 2: Design
Using the questionnaire and our meeting as a guide, I’ll design the layout and functionality of the website. I use software to create the design mockups which I’ll provide to you in a pdf format, and this mockup document serves as a blueprint for the build phase. We’ll probably go through a few iterations of mockups until we have something that you approve of. Once I get your sign off, I’ll start building the site.
Step 3: Build
In the same way a contractor uses a blueprint to build a house, I’ll use the approved mockup as a guide to build the website. To ensure that search engines and others can’t view the website as it’s being built, I’ll password-protect it. I’ll provide you with the link and the password so that you can see the progress. You will also provide the content for the website during this step.
Step 4: Launch
Once the website has been built and everything is in place, we’ll meet to go over the site together. I’ll address any changes that you would like to see made to the website. We can have numerous reviews until we get the website to a place where you’re happy with it. When you feel like the site is ready, I’ll assign the website address to the site, take off the password protection, and the site is launched!
Step 5: Support
This step is what differentiates me from my competition. At the end of the day, I want you to be happy with the website I build for you and I won’t leave you hanging.
After launch, I’ll provide 2 weeks of unlimited support for free. If there are any issues, I’m ready and available to address any changes that need to be made at no charge to you.
Following the two week support period, you can handle the website updates on your own if you’re so inclined, or we can establish a maintenance agreement where I make updates for you upon request. A lot of web designers will charge you a monthly fee, regardless of whether you ask them to make updates to the site or not, but I won’t do this. I’ll only bill you when I do work for you.
What Does This All Mean?
My web design process is a streamlined, efficient workflow that has never failed me, and it won’t fail you either. Whenever you’re ready, contact me and we’ll walk through these steps together and arrive at our destination: A website you can be proud of.


Leave a Reply
Want to join the discussion?Feel free to contribute!